mirror of
https://github.com/correl/digitalaudioswitch.git
synced 2024-12-03 11:09:54 +00:00
Audio Input and Volume Control
| freecad | ||
| kicad | ||
| tests | ||
| .gitignore | ||
| button.py | ||
| case.png | ||
| cd4052.py | ||
| finished.jpg | ||
| main.py | ||
| Makefile | ||
| mcp4.py | ||
| pcb.png | ||
| README.org | ||
| rotary.py | ||
| rotary_irq_esp.py | ||
| ssd1306.py | ||
| statetree.py | ||
Audio Input and Volume Control
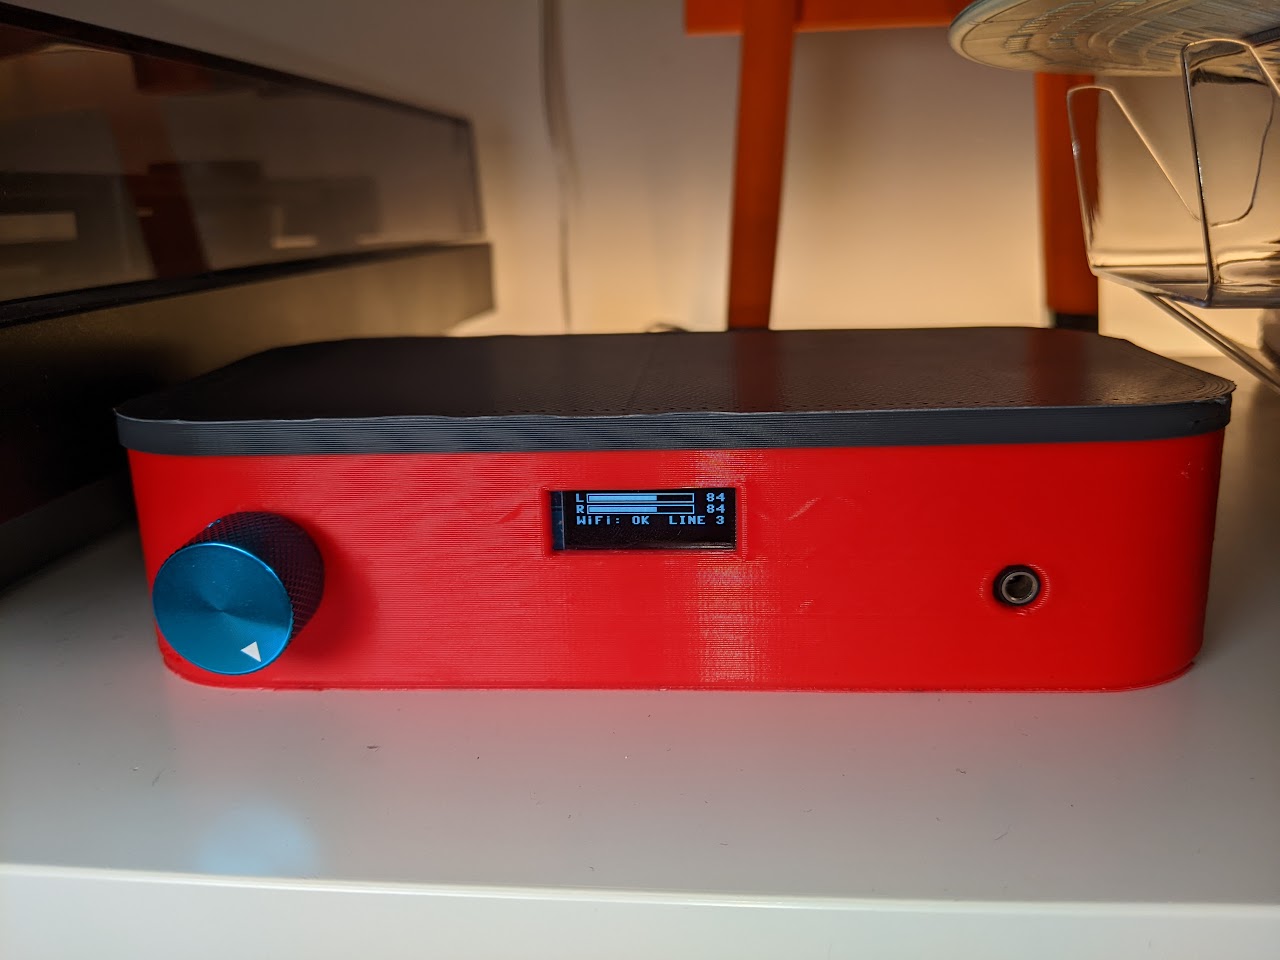
Features
- Switches between three external inputs, outputting through the 3.5mm LINE OUT jack.
- Volume control and input switching can be done using the pressable dial on the front
- Current status is displayed on a 128x32 OLED display
- Can be fully controlled via Home Assistant as an MQTT-discoverable device.
Firmware
Configuration
Create a file named settings.json in the project directory with WiFi and MQTT
connection information.
  {
      "wifi": {
          "ssid": "MY-SSID",
          "password": "my-wifi-password"
      },
      "mqtt": {
          "broker": "192.168.1.123",
          "prefix": "digital-audio-switch"
      }
  }
Deploying
Connect the ESP32 to your computer. If you haven't already, flash it with the latest version of MicroPython, and ensure you have mpremote installed.
Running make will install dependencies and copy the code and configuration to
the ESP32, resetting it when done.
Circuit Design
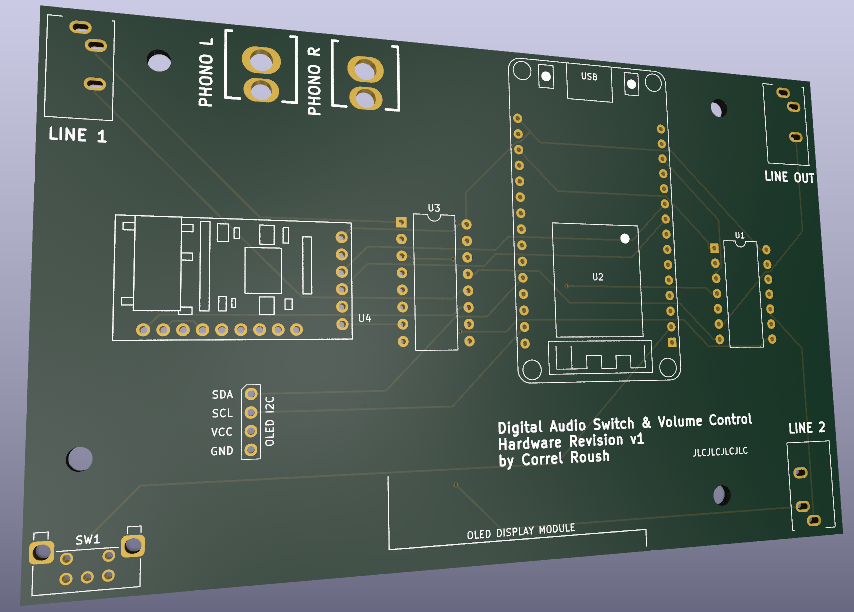
The schematic and board layout can be found in the kicad folder.
Case
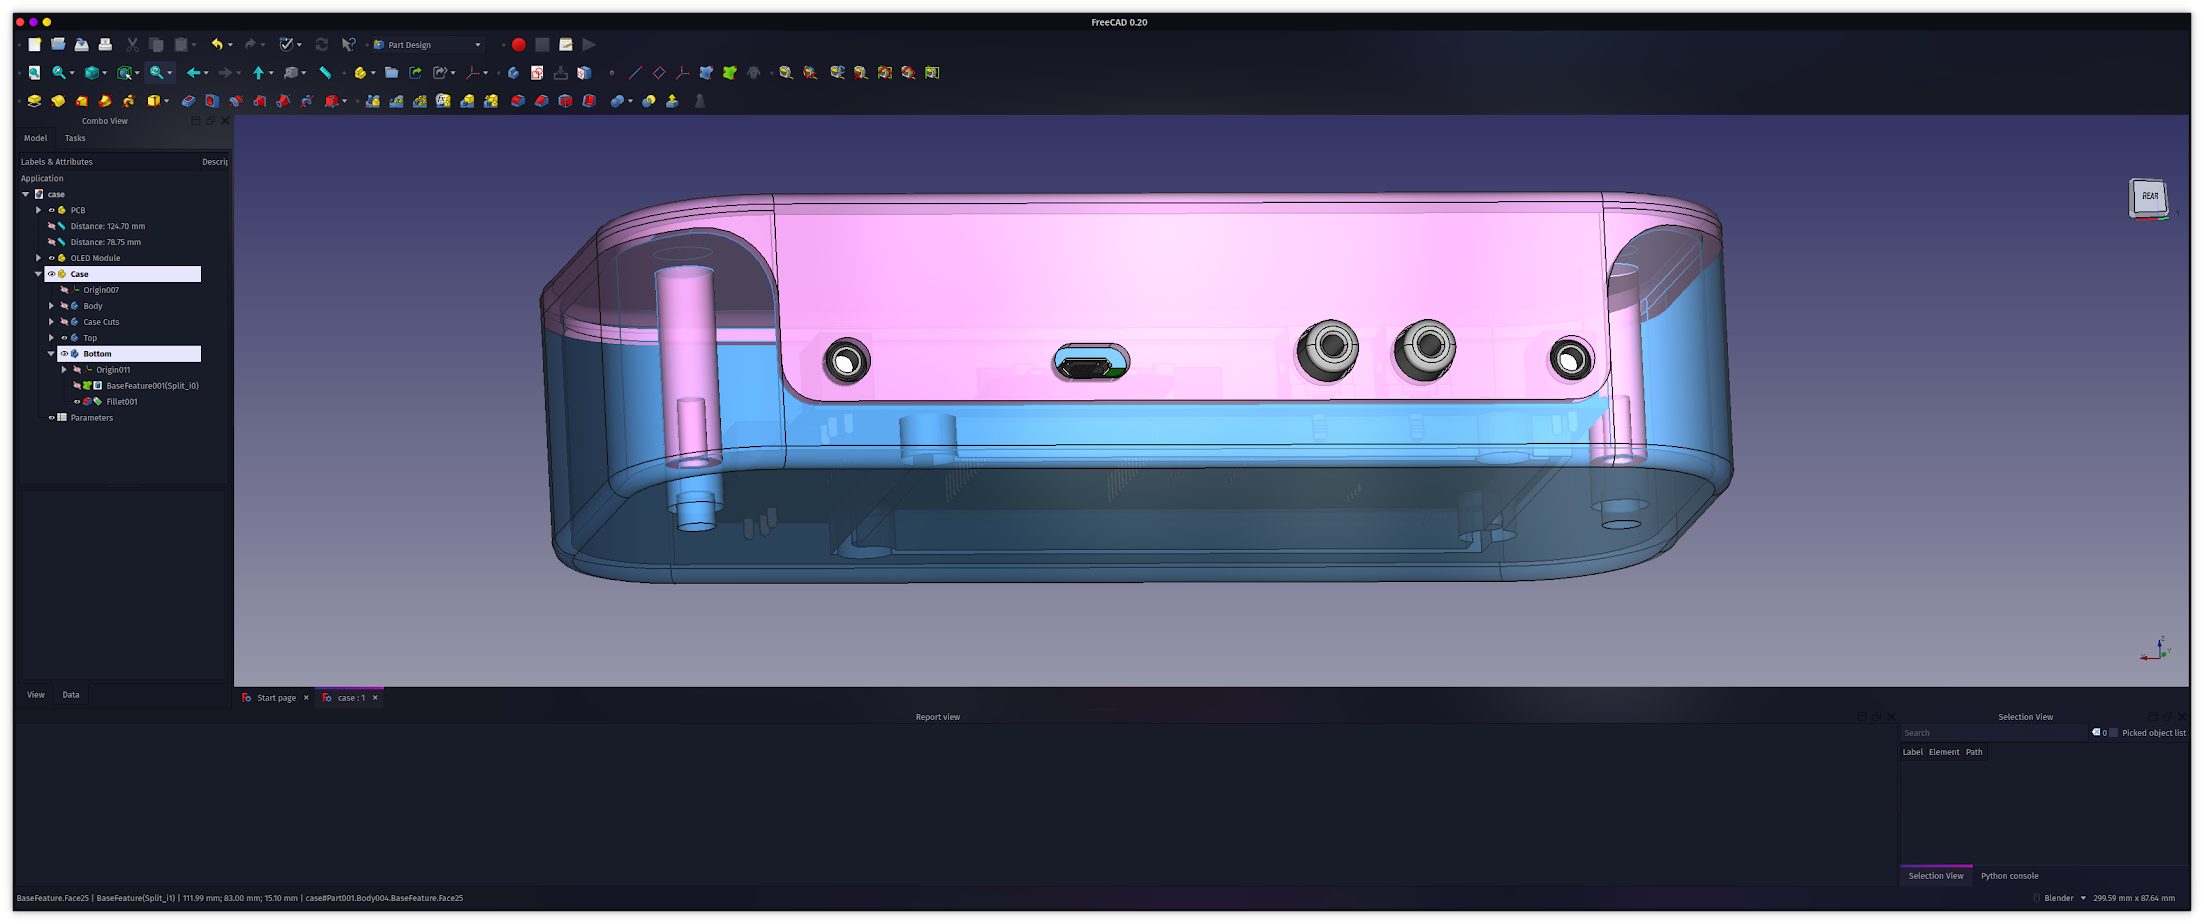
The 3D-printable case is built using FreeCAD and can be found in the freecad folder. It is divided into a top and bottom piece. The PCB is affixed using four M3 threaded inserts and 6mm M3 bolts, the case is assembled using 2 M3 threaded inserts and 2 10mm M3 bolts.